Introduction
Bringing nature indoors transforms your living space into a vibrant sanctuary, but keeping those green companions healthy requires more than just occasional watering. Indoor plants care has become both an art and a science, blending traditional wisdom with modern understanding of plant biology. Whether you're a seasoned plant parent or just brought home your first pothos, mastering the fundamentals of indoor plants caring will help your botanical collection flourish year-round.
The truth is, most houseplants don't die from neglect—they perish from too much love or the wrong kind of attention. Understanding what your plants actually need versus what you think they need makes all the difference between a thriving jungle and a collection of sad, drooping leaves. This comprehensive guide covers everything from basic watering techniques to advanced topics like indoor plants repotting, ensuring you have the knowledge to keep any houseplant happy.
Throughout this article, you'll discover practical strategies for light management, watering schedules, humidity control, and troubleshooting common problems. We'll explore specific care requirements for popular varieties, including indoor plants peace lily care, and provide actionable tips you can implement immediately. By the end, you'll have the confidence to nurture a thriving indoor garden that enhances your home's beauty and air quality.
Understanding Your Indoor Plants' Basic Needs
Light Requirements: The Foundation of Plant Health
Light serves as food for your plants through photosynthesis, making it the most critical factor in indoor plants and care. Different species evolved in varying natural habitats, from dense rainforest floors to sun-drenched deserts, which explains why a cactus and a fern have dramatically different light preferences.
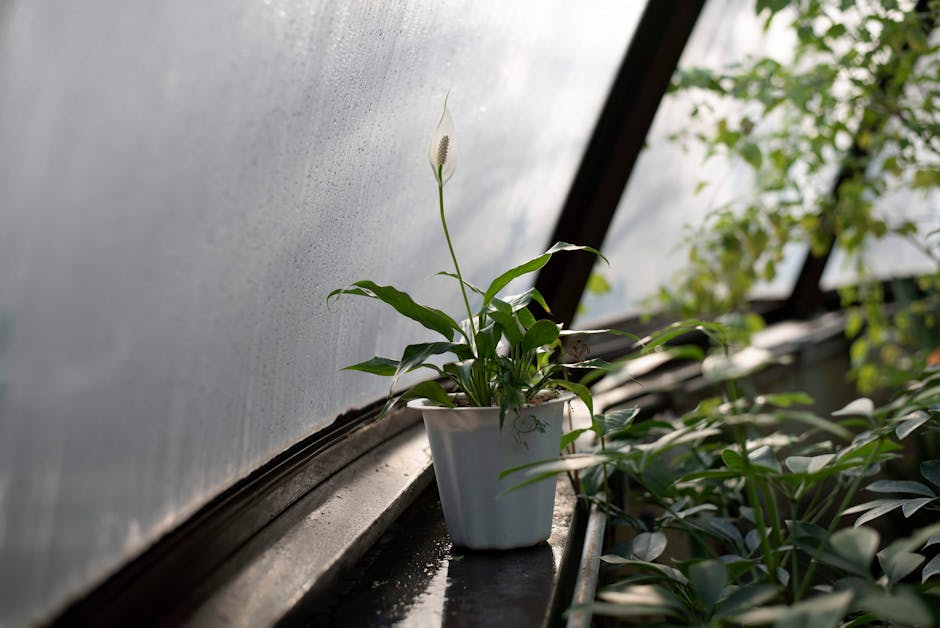
Most indoor plants fall into three categories: low-light, medium-light, and bright-light plants. Low-light plants like pothos, snake plants, and ZZ plants tolerate spaces away from windows, though they'll grow more vigorously with moderate indirect light. Medium-light plants, including philodendrons and peace lilies, thrive within a few feet of east or west-facing windows. Bright-light lovers such as succulents, cacti, and fiddle leaf figs demand spots near south-facing windows or directly in eastern or western window sills.
Watch your plants for light-related stress signals. Leggy growth with large spaces between leaves indicates insufficient light, while brown, crispy patches on leaves suggest too much direct sun. Rotating your plants quarterly ensures even growth and prevents them from leaning permanently toward their light source.
Water Wisdom: Finding the Perfect Balance
Overwatering kills more houseplants than any other mistake in indoor plants care. The "water once a week" advice oversimplifies a complex issue because water needs vary based on plant species, pot size, soil type, humidity, temperature, and season.
The finger test provides a reliable watering indicator for most plants. Insert your finger two inches into the soil—if it feels dry at that depth, water thoroughly until liquid drains from the bottom. For succulents and cacti, wait until soil dries completely throughout the pot. Tropical plants like ferns prefer consistently moist (not soggy) soil.
Water quality matters more than many beginners realize. Tap water containing high levels of chlorine, fluoride, or minerals can cause brown leaf tips and stunted growth. Let tap water sit overnight to allow chlorine to evaporate, or use filtered water for sensitive plants. Always use room-temperature water, as cold water shocks roots and can cause stress.
Temperature and Humidity: Creating a Comfortable Environment
Most houseplants originate from tropical or subtropical regions where temperatures remain relatively stable and humidity stays high. Your home's environment likely differs significantly from these conditions, requiring adjustments for optimal indoor plants caring.
The ideal temperature range for most houseplants sits between 65-75°F during the day and 55-65°F at night. Avoid placing plants near heating vents, air conditioning units, or drafty windows where temperature fluctuations stress them. Cold drafts cause leaf drop, while excessive heat leads to rapid moisture loss and wilting.
Humidity presents a bigger challenge in modern homes, especially during winter when heating systems dry the air. Most tropical houseplants prefer 40-60% humidity, while typical indoor environments hover around 30%. Increase humidity by grouping plants together, placing pots on pebble trays filled with water, or running a humidifier nearby. Misting provides temporary relief but doesn't significantly impact overall humidity levels.
Mastering Essential Indoor Plants Care Techniques
Proper Watering Methods for Different Plant Types
Bottom watering offers advantages over traditional top watering for many houseplants. Place your potted plant in a container of water for 10-15 minutes, allowing soil to absorb moisture through drainage holes. This method encourages deeper root growth, prevents fungus gnats, and ensures even soil saturation without waterlogged surface soil.
Drought-tolerant plants like succulents, cacti, and snake plants follow a "soak and dry" approach. Water deeply and thoroughly when soil dries completely, then don't water again until soil returns to that completely dry state. This mimics their natural environment where rain comes infrequently but abundantly.
Moisture-loving plants including ferns, calatheas, and peace lilies require more frequent attention. Check these plants every few days, maintaining consistently moist (never soggy) soil. These varieties also benefit from higher humidity, so consider their placement carefully within your home.
Fertilizing: Feeding Your Green Friends
Indoor plants grow in limited soil volumes, depleting nutrients faster than outdoor plants. Regular fertilization during the growing season (spring and summer) keeps plants healthy and vibrant. Most houseplants benefit from balanced, water-soluble fertilizer applied every 2-4 weeks during active growth.
The three numbers on fertilizer packages (like 10-10-10) represent nitrogen, phosphorus, and potassium ratios. Nitrogen promotes leafy growth, phosphorus supports root development and flowering, while potassium strengthens overall plant health. Foliage plants thrive with higher nitrogen, while flowering plants need more phosphorus.
Reduce or eliminate fertilizing during fall and winter when most houseplants enter dormancy or slow growth phases. Over-fertilization causes more harm than under-fertilization, manifesting as brown leaf tips, white crusty deposits on soil, or stunted growth. When in doubt, dilute fertilizer to half the recommended strength.
Pruning and Grooming for Optimal Growth
Regular pruning maintains attractive plant shapes, encourages bushier growth, and removes damaged or diseased foliage. Use clean, sharp scissors or pruning shears to make cuts just above leaf nodes at a 45-degree angle. This positioning promotes new growth from the node while preventing water from collecting on the cut surface.
Remove yellow, brown, or damaged leaves promptly as they drain energy from healthy growth and can harbor pests or diseases. Don't be afraid to trim aggressively—most houseplants tolerate heavy pruning and respond with vigorous new growth. Spring represents the ideal pruning time when plants naturally push out fresh foliage.
Dust accumulation on leaves blocks light and reduces photosynthesis efficiency. Wipe smooth-leaved plants monthly with a damp cloth, and shower fuzzy-leaved varieties gently to remove dust. Clean leaves also help you spot pest problems early before infestations become severe.
Indoor Plants Repotting: When and How to Do It Right
Recognizing When Your Plants Need Repotting
Indoor plants repotting becomes necessary when plants outgrow their containers, typically every 1-3 years depending on growth rate. Roots circling the pot's bottom or growing through drainage holes signal that repotting time has arrived. Other indicators include water running straight through without absorbing, soil drying out extremely quickly, or growth significantly slowing despite proper care.
Spring offers the best timing for indoor plants repotting when plants enter their active growing season and recover quickly from transplant stress. Avoid repotting during winter dormancy or when plants are flowering, as this diverts energy from blooms and stresses already inactive plants.
Not all plants need larger pots—sometimes refreshing the soil in the same container suffices. Root-bound plants that have filled their pots need sizing up to containers 1-2 inches larger in diameter. Jumping to much larger pots risks overwatering issues since excess soil retains moisture that roots can't absorb.
Step-by-Step Repotting Process
Begin indoor plants repotting by selecting an appropriate container with drainage holes. Water your plant thoroughly 1-2 days before repotting to reduce transplant shock. Prepare fresh, appropriate potting mix for your plant type—standard houseplant mix works for most species, while cacti and succulents need grittier, fast-draining mixes.
Gently remove the plant from its current pot by turning it sideways and tapping the bottom while supporting the base. If roots have become severely bound, carefully tease them apart or make vertical cuts through the root ball to encourage outward growth. Remove old, depleted soil from around roots without damaging the root system.
Place fresh soil in the new pot's bottom, position your plant at the same depth it previously grew, and fill around roots with new potting mix. Firm soil gently to eliminate air pockets, water thoroughly, and place the plant in a slightly shadier spot for a week while it recovers. Resume normal indoor plants care routines once new growth appears.
Post-Repotting Care Tips
Expect some transplant shock even with careful repotting—leaves may droop or yellow slightly as plants adjust. Reduce watering frequency immediately after repotting since fresh soil retains moisture better than depleted old soil. Wait 4-6 weeks before fertilizing to avoid burning newly disturbed roots.
Monitor your repotted plants closely for signs of stress or problems. Excessive wilting might indicate root damage or overwatering, while new growth signals successful establishment. Most plants bounce back within 2-3 weeks and show renewed vigor from their fresh soil and expanded root space.
Some plants, like snake plants and pothos, tolerate being slightly root-bound and actually flower more readily under these conditions. Research your specific plant's preferences before automatically repotting when roots reach the container's edge.
Indoor Plants Peace Lily Care: A Detailed Case Study
Why Peace Lilies Make Perfect Houseplants
Peace lilies rank among the most popular houseplants for excellent reasons. These elegant plants tolerate low light better than most flowering varieties, forgive occasional watering mistakes, and communicate their needs clearly. Their dramatic wilting when thirsty reverses quickly after watering, teaching beginners to read plant signals.
Beyond aesthetics, peace lilies actively purify indoor air by removing toxins like formaldehyde, benzene, and carbon monoxide. NASA's Clean Air Study identified them as one of the most effective air-purifying plants. Their white spathes (often mistaken for flowers) add elegant touches to any room, lasting several weeks before fading.
Indoor plants peace lily care suits beginners while offering enough interest for experienced plant parents. They adapt to various light conditions, though they bloom more prolifically in brighter indirect light. Understanding their specific needs helps you maximize both foliage beauty and flowering frequency.
Specific Peace Lily Care Requirements
Light for peace lilies should be bright and indirect—too much direct sun scorches leaves, while insufficient light reduces flowering. North or east-facing windows provide ideal conditions, or place them several feet from south or west windows. They'll survive in low light but may not produce their characteristic white blooms.
Water peace lilies when the top inch of soil feels dry, typically once weekly. These plants dramatically wilt when thirsty, providing an unmistakable watering signal, though it's better not to let them reach that point regularly. Consistent moisture without waterlogging keeps foliage glossy and promotes flowering.
Peace lilies crave humidity and benefit from misting, pebble trays, or humidifier placement. Brown leaf tips often indicate low humidity or fluoride sensitivity from tap water. Use distilled or filtered water if you notice this issue. Feed monthly during spring and summer with diluted balanced fertilizer to encourage blooming.
Troubleshooting Common Peace Lily Problems
Yellow leaves on peace lilies typically result from overwatering or poor drainage. Check that your pot has adequate drainage holes and allow soil to dry slightly between waterings. Remove yellow leaves at their base to redirect energy toward healthy growth.
Brown leaf tips suggest water quality issues, low humidity, or fertilizer salt buildup. Flush the soil thoroughly with distilled water every few months to remove accumulated salts. Increase humidity through grouping, misting, or humidifiers to prevent future browning.
Lack of blooms frustrates many peace lily owners but usually stems from insufficient light. Move your plant to a brighter location with indirect light and ensure you're fertilizing during the growing season. Peace lilies also need slight dormancy periods, so don't worry if blooming pauses during winter months.
Common Indoor Plants Care Mistakes and Solutions
Overwatering: The Number One Plant Killer
Overwatering causes root rot, fungal diseases, and eventual plant death more frequently than any other care mistake. Well-meaning plant parents kill their green friends with kindness, assuming more water equals better care. Roots need oxygen as much as water, and constantly soggy soil suffocates them.
Signs of overwatering include yellow leaves, soft mushy stems, fungus gnats, and a sour smell from soil. If you suspect overwatering, allow soil to dry out completely before watering again. For severe cases, remove the plant from its pot, trim away black or mushy roots, repot in fresh soil, and adjust your watering schedule.
Prevent overwatering by checking soil moisture before watering, ensuring pots have drainage holes, and using well-draining potting mixes. Remember that plants need less water during winter, in low light conditions, and when newly repotted. When uncertain, waiting an extra day or two before watering rarely harms plants.
Ignoring Pest Problems Until They're Severe
Indoor plants attract various pests including spider mites, mealybugs, scale, aphids, and fungus gnats. Early detection makes treatment much easier, so inspect your plants weekly for signs of infestation. Look for webbing, sticky residue, visible insects, or distorted new growth.
Isolate affected plants immediately to prevent pests from spreading to your entire collection. Treat minor infestations by wiping leaves with soapy water or spraying with neem oil solution. For severe problems, consider systemic insecticides or removing heavily infested plants to protect others.
Prevention works better than treatment in indoor plants caring. Quarantine new plants for 2-3 weeks before introducing them to your collection, maintain good air circulation, avoid overwatering (which attracts fungus gnats), and keep plants healthy since stressed plants attract pests more readily.
Poor Drainage and Wrong Soil Choices
Using garden soil or containers without drainage holes sets plants up for failure. Garden soil compacts in containers, suffocating roots and retaining too much moisture. Always use potting mix specifically formulated for container growing, which provides proper aeration and drainage.
Different plant types need different soil compositions. Cacti and succulents require gritty, fast-draining m
Conclusion
Successful indoor plants care doesn't require a green thumb—just understanding a few fundamental principles. The key takeaways are mastering your watering schedule by checking soil moisture rather than following a rigid calendar, providing appropriate light conditions based on each plant's natural habitat, maintaining proper humidity levels especially during dry seasons, and staying vigilant against common pests through regular inspection and prevention.
Remember that most plant problems stem from overwatering and insufficient light, so start by addressing these two factors first. Choose the right soil mix for your specific plants and always use containers with drainage holes to prevent root rot.
Your next steps are simple: assess your current plants' conditions today. Check the soil moisture, evaluate their light exposure, and inspect leaves for any pest activity. Make one improvement at a time rather than overhauling everything at once. Start a simple care journal to track watering dates and observe how your plants respond to changes.
With patience and consistent attention to these basics, you'll develop an intuition for what your plants need. Begin implementing these practices today, and watch your indoor garden transform from merely surviving to truly thriving.